TM 5-3610-259-14
c.
Remove mounting screws for control panel.
d. Carefully lift control panel from its mount to gain access to wiring.
e.
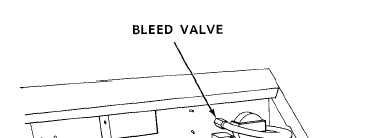
Remove vacuum bleed valve control knob by turning left until knob and
needle valve are removed.
f. Remove vacuum hose from hose connector on bottom of bleed valve.
9.
Remove locknut from top of vacuum bleed valve and remove defective
bleed valve.
h.
Remove hose connector from bleed valve.
i.
Reinstall hose connector to new bleed valve.
j.
Install new vacuum bleed valve and locknut.
k. Reinstall vacuum hose to hose connector,
1.
Loosen setscrew on vacuum bleed valve control knob and remove defective
needle valve.
m.
Install new needle valve into control knob and tighten setscrew.
n.
Reinstall vacuum bleed valve control knob and needle valve by inserting
into bleed valve and turning right until valve is closed.
o.
Carefully lift control panel onto its mount.
P.
Reinstall mounting screws for control panel.
q.
Rotate glass frame into horizontal position and lock into place with
frame release knob.
r.
Turn on power panel circuit breaker.
2-81


