TM 5-6675-319-14
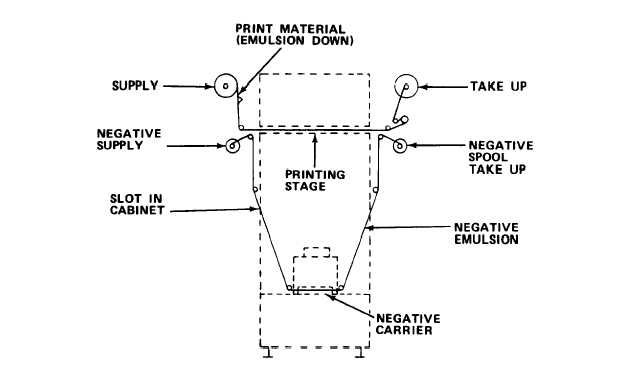
( b ) I f n e g a t i v e t o b e c o p i e d i s i n r o l l f o r m , t h r e a d n e g a t i v e ( e m u l-
sion side up), as shown in threading diagram above. Then turn take-up spool until
negative is firmly engaged, and proceed to next step.
(30) Negative copy set - up .
( a)
( b)
( c)
( d)
( e)
( f )
( g)
( h)
( 3 1 ) S e t
Close and latch lens box.
Set MODE switch to TEST.
Place piece of translucent material over mask.
T u r n o f f a l l l i g h t i n g e x c e p t a l l o w a b l e s a f e l i g h t s.
Turn on NEGATIVE CARRIER switch.
Position selected negative for proper projection on print stage.
Turn off NEGATIVE CARRIER switch.
Remove translucent material from print stage.
MODE switch to AUTO.
NOTE
I f r o l l - p a p e r p r i n t i n g m a t e r i a l i s t o b e u s e d , f o l l o w s t e p s ( 3 2 ) t h r o u gh
( 3 4 ).
If cut-sheet printing material is to be used, proceed to step (39).
9-46